How did you use media technologies in the construction, research, planning and evaluation stages?
For this project, we have used many sources and technologies to plan and research for our main trailer to the most advantages as we could and if we didn’t use it, we don’t think it would be successful and we wouldn’t got the final products we have now.
Planning and Research
|
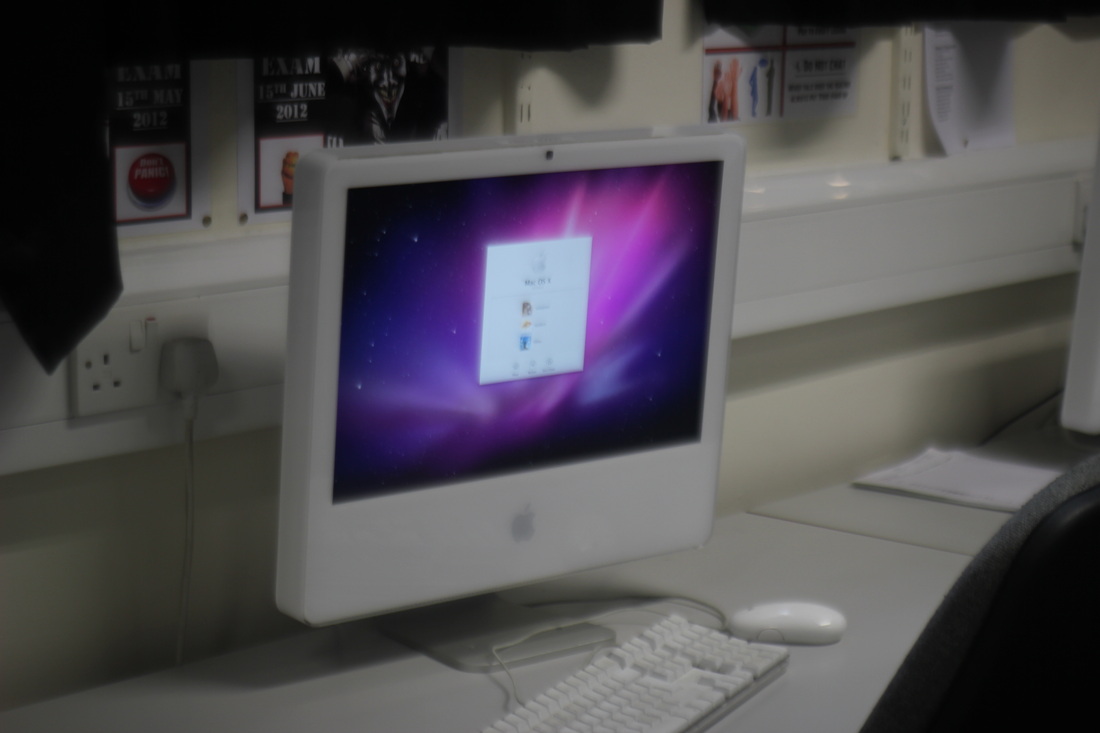
We found website technology played an important role to our project. The site where we post and present all our work on is Weebly. Weebly is an online free widget-based website creator which allows us to create pages fast by just dragging and dropping different page elements (text, picture, title, Youtube Video..) It was quite accessible and clear to use for us because all the elements was laid out at the top ready for us to use. Weebly allowed us to present out all our work to a professional standard and also let us name the address as we wished for people to visit. Overall Weebly was really convenient to us as there were a lot of elements, which was really useful and suitable for the style we want. Since our genre was horror, we wanted a dark theme and there were a range of fitting styles for us to chose from the site. It also allows us to add, name and place as many pages as we want. We found it very helpful, as everything was organized in the right place, not just for making it easy for us to view, but for other people too. When finished uploading, all we had to do is hit the ‘publish’ button and it’s done!
|


|


|
We used computer software Microsoft Office Word, which is a word processor designed by Microsoft. It allows us to create texts and has features such as ‘bullets and numbering’, spell checks which were essential, creating tables and also have different types of charts (bar chart, line, pie etc). So for our audience research which was quite important to us as this will allow us to know our audience more, what their likes and interests of horror is, this is what we used to make questions with then, created pie charts for our results to be shown, after we saved the charts as images from Photoshop as a JPEG so we can upload it on Weebly. Not just using Word we also used Blackberry Messenger which is a form of instant messaging to find out what our audiences interests were which was handy. |
|
The main search engine we used to research not just on existing J-horror posters and magazines, but other aspects of horror that we think will be essential to our research and planning is Google, it was really convenient to us as it allows us to type in anything we wish to finds out and it would appear up for us in just a click. We can choose from the ‘Search’ tab, this will gives us mainly text information from a variety of different sources and sites that will help us, if we want images and photos then we would click on the images tabs, to be more specific in what we’re looking for, Google provides us with different sizes from large to a size we can type in. |


|


|
What we also found very useful to our project is Youtube, a video sharing website where users can sign up and upload, like, share, comment view most videos that they search for. It was really useful to use because most of us have a Youtube account already and go on it and use it on a daily basis to watch music videos or films. As we have to research on J-horror trailers for our work, this is why we used Youtube as most videos are uploaded on this site ready for us to watch, we managed to watch many ranging from Western horror to Asian horror trailers to give us ideas for our trailer we made later on and analyze it for research. Other areas we researched on Youtube were make-up tutorials for our protagonist in our trailer which we found very useful. We also use it to upload our own work on Youtube so we can embed in onto Weebly. Youtube lets us private videos that we don’t want to be viewed by anyone, while our videos are uploading, we can change the name and also add description and tags to the video so it can be searched easier as well as viewers can know what the video is about. |


Internet overall was crucial to us as we can get work off such as storyboard templates or call sheets and we made sure we used all this to all of our advantages as we could. We can also contact or send work to everyone in our group via mail/Skype to give or share tasks that could be done such as researching on sounds or moodboard, this is especially helpful when one member of the group is absent. What we learnt about the Internet is that we can find almost anything we need from most sites.
|
We’ve made a few videos before making our final trailer, the Camera Technique Video and Animatics and this is all part of research and planning. The Technique video was to help us know how to use the camera on the tri-pod and off it, it also helps us remind ourselves of all the angles and shots of the camera because we’ve already learnt it from last year. This will help us get use to it and not to waste time when filming the final trailer as well as it helps us know if the shots will work in some circumstance or not. The other video that we made was the animatic. These are pictures that have been put into the right place where we would want the trailer be with a piece of music from an existing trailer. By doing this video, it will be useful to use as we’ll have an idea of where everything should be and know vividly the duration of our teaser trailer. |


|
As some of us are big fans of horror movies already, we watched more J-horror movies for inspiration for our own work. By doing so it will help us by showing us what our characters could look like especially the antagonist and protagonist, how we can make our music that’s similar to the Japanese and also camera lighting and shots. Some of us watched the films online, on television or on DVD’s that we purchased. We also watched online streaming too.
Movie Teaser Trailer
Before filming our final trailer, we have already familiarized ourselves with the camera by making the Camera Technique Videos as mentioned before. We managed to practice a range of shots such as ‘medium close up’ or ‘establishing shot’. We also know how to set up the camera because we practiced a few times and been taught how to by our teacher. This helped us save lots of time as we didn’t struggle and have any problems with setting it up on the tri-pod because one member in our group studies Photography so that was an advantage to us even more, so we didn’t find it difficult to set up the equipment without the aid of our teacher.
|
|
Because there are only two cameras in the Media department that can be used to film, at one point there was only one video that everyone had to take turn to use and share with each other, which cost us a bit of time so we was behind schedule in filming our footages, but at the end we still manage to film the main shots that was needed in the trailer. For one scene (girl looking through the window), we couldn’t get the camera to be in focus of the subject and the reflection of the camera person was visible from the glass in the video so it didn’t turn out how we wanted it to so end up taking that scene out of our trailer because it didn’t turn out how we wanted it to and also it looked very blurry and wasn’t clear which we can lose marks for.
|
|
The camera we used for filming our trailer is the Canon EOS 7D, they were all Canon EFS lenses. There’s a various of size from 5omm- 1.8/ 18mm- 135/ 3.5-5.6/10- 22mm at 3.5 aperture. All of the lighting or focus depends on with number we switch to. As well as using the camera for filming, we used other equipments as well. ☀ Vinten Tri-pod: This is a 3legged stand used to stabilize and elevate the camera we used, flash unit or any other photography equipment. Tri-pods are used for still and prevent camera movement as well as reducing camera shake, so this can achieve the maximum sharpness, the tri-pod is also helpful in achieving the precise framing of the image. We used this tri-pod for almost every scene in our trailer. ☀ Gorilla-pod: This is basically a small tri-pod but it has 3 flexible legs that can bend and wrap whichever way to stabilize the camera. It can be put on surface that would be impossible for the normal tri-pod. Even though the legs are flexible, it won’t be strained by the weight of the camera, also the camera can be attached by secure locking ring so it secures the camera, this helped us a lot during the scene when our character was walking on the road as we needed the shot to be steady, shake free. ☀ KaiLite Z96: These are small lights that can be hand held and adjust anyway wanted, it has knob that can be turned to make it dimmer or brighter. These lights were used during the hanging scene, it help get rid of the shadow of the subject we was filming so it would only focus on that. |


|
Using a camera is not just about clicking a button then it films or takes photos, there are many settings that can be changed even though we use need some of these such the white balance, we learnt that the white balance setting focuses on subjects that are white and keeps the color white in the image even though it’s clear to us that it’s the color white but appears as a yellow/blue in the shot that have been taken. Another thing we learnt about the cameras is how to focus the subject that’s been filmed, to this we turn the lens on the camera until it’s in focus and everything else is blurred out. Throughout our trailer we had to do this.
What we learnt about the depth of field is that it’s the spacing between the subject and the background that appears acceptably sharp, depending on the aperture and focusing distance. 
|
The ISO on the camera is the sensors sensitivity to light, the higher the sensitivity, the less light is needed to make an exposure. The main number we used to film was 100-200. Because we filmed in mostly bright places with a lot of exposure to light (outdoor scenes during the day) for some scenes of our trailer, we set the ISO low, this will give us excellent quality, allows for lots of details to be seen and the footage will be good quality. On the other when filming inside where lightings will be a bit darker we have to set the ISO high around 200/400 so the quality can be just as good as filming outside, but we realized that the higher the ISO, the quality of the footage will degrade and noise can appear.
To create a low-key footage in some scenes in our trailer we changed the settings of the shutter speed and the aperture. The shutter speed is how fast lights come into the camera so we would change the speed to 1/100, the higher the number the darker it will be. The aperture is how much light comes into the camera, we also set this quite low. These two settings combined together helped us create a low-key footage which helped us in some scenes of the trailer.
|


We didn’t have a lot of trouble setting up our lights when needed although in the scene where the character hangs her self, there were some shadows that we wanted to get rid of from using the key-light which was in a directional position, so we had to use the KaiLite Z96 and shined it on the shadow. Other than that, there were no problems that occurred with lightings.
Movie Poster and Magazine Front Cover
|
To help us follow conventions on magazine, we used mainly the Internet to find and look at existing film magazines and also bought film magazines to look at to see clearer of how the layout is, we learnt that all the text between the same branded magazine seem to match and use the similar font to each other. 
|

As we wanted to spend more time on making the prints up to standards, we tried not to spend a lot of time taking photos for our magazine so we only used a limited amount of time doing this when we have breaks between lesson but of course making sure the photos we took were good quality and usable. As we already had ideas and drafts of the two prints, all we had to do was set up the lights, have the characters make-up done, props and costume ready and took many photos. This saved us a lot of times, as we didn’t have to sit and think of what kind of photos we can take. We didn’t just take one or two photos for the prints but we took a lot, this will give us a range of photos to choose from and also incase if there are photos that are out of focus that can’t be used. |
|
The positioning of the lights for this shoot was directional, just using the KinoFlo key-light to focus on the subject so we placed it at the side of the subject, if placed at the front shining directly to the subject, the can make the image appear really flat. We could of position the lights into three-point lighting but it wasn’t really needed. This is having three lights, one light is the key-light at the side of the subject, another one behind the subject the back light which separates the subject from the background and the last next to that light facing the background, the background light so this would illuminates it. |

This is directional lighting and the room where we took our photos

Here's a digram that we've made to show three-point lighting
|
|
We didn’t keep the lighting at one place at the side of the character but also placed it on the floor shining upwards at the character to test out and see how the photos turn out, some turned out quite well so it was used in our poster. |
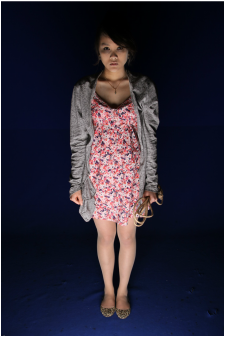
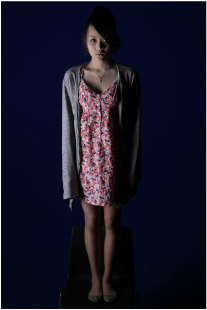
We used the Bowens Flash Kit, which is part of the lighting equipment to create artificial light by flashing when we take the photos, some photos we didn’t use the flash so the photos turned out dark and the characters were not visible. This was our main source of light and of course using the EOS 400D for taking the photos, which were also with Canon EFS lenses with sizes from 35- 50 that is 3.5- 5.6.

|

|
|
The manipulation software we used for the poster and magazine is Photoshop CS3, this is a graphics editing program. As we know how to use Photoshop already from AS work, it still took longer to complete the prints than we thought because for the poster, it was done on the wrong image size (A4/A3) so we had to do some bits again such as cutting out the subject and placing it into the final print as it might be pixelated when changing from A4 to A3. Photoshop allows us to change and manipulate almost anything, such as changing the contrast and brightness of the image, blur out objects, there are also filters that can be chosen to change the looks and add effects to the image such as the ‘distort’ tool and under that will give many more options like ‘diffuse glow’. It was easily accessible for one of us who were designing the Poster in the group because of already having it at home, so work can be done there. |


|


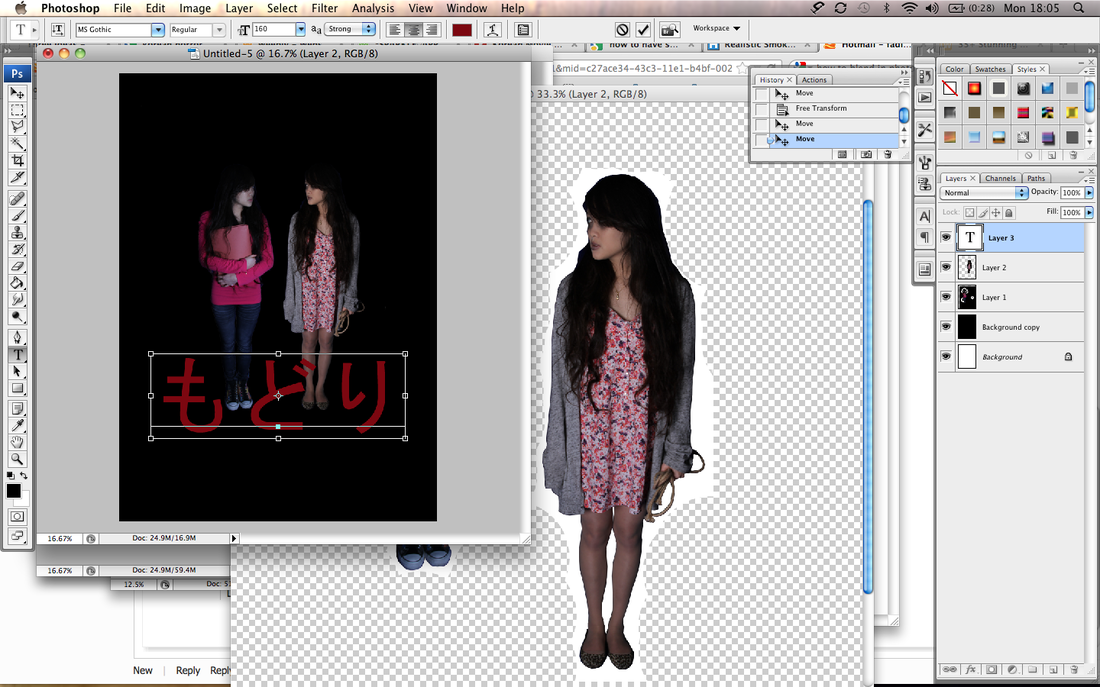
Here, using the 'text box', the title has been made with two different layers to create the effect above with different colors, to do this, the layers needed to be duplicated. The credits has also been added at the bottom using this tool. To try and get the text looking equal in the right position, the 'grid' was switched on

Here is on photoshop the beginning stage of designing the poster using the lasso tool to crop out the figure to put onto another layer.
|
We didn’t just experiment with one idea that was chosen from the mock-ups but tried out several different styles to see if it will work or not so two posters were made but the better one was chosen to become the final product. This software also allows us to add text into our work and change the color or add some effects that would follow the conventions of film magazines and horror posters, which we found very convenient. We used the fonts that already exists in Photoshop provided for us for mostly all the text on both prints, there’s also different type of fonts for Japanese, Korean and Chinese writing which we found useful for us because we used Japanese text in our work as the genre we followed was J-horror. 
This image is of photo is of photoshop for poster when another idea was tried out to see if it works or not, the tool was used here was a lasso tool to crop.
|


|
This image shows the process of the magazine being created. Both figures was cropped out with a lasso tool and placed onto a new layer with the masthead added along with other conventions. Photoshop allows us to create different effects on our masthead to make it look more interesting and catch the readers eyes. |
|
The credits we used were ‘Steel Tongs’. Originally it doesn’t exist on dafont.com anymore but luckily the teachers from last year saved it so we were still able to install it into Photoshop and use it for our work. ‘Steel Tongs’ was really handy as it already have buttons such as ‘directed by’ just by clicking a letter without the Caplocks on and it would come up which looks very professional and like existing posters credits. If we wanted to type normally then we would have to put the Caplocks on and type away. |

|

|
When shooting our photos with lights and equipments set up around, there are many health and safety issues that we must be aware of. The main rules is that we must not have food and drink around the equipment as this can damage them and even cause harm to ourselves because of water mixed with electric. We also must be careful when moving the key-lights around, as it may be hot especially when it’s turned on for a long time so we must be careful not to burn ourselves. Other basic issues we also should not is to watch the wires around when walking so we won’t trip on them and break the equipment as well as make ourselves fall. |
EVALUATION
|
To edit our teaser trailer, we used Final Cut
Pro which is a non-linear video editing software. It allows us to cut the
video, add effects/ and various transitions as well as filters, change the
color brightness/contrasts of the footage and also add captions with many other
elements too. Before we can edit and put together all the clips in the right
place and order, we need to import all the raw videos and add it to the time
line and start editing! Once finished we export the file using Quicktime
conversion into a Quicktime movie, this will help us make it easier to upload
the file into sites such as Youtube so then we can embed onto Weebly.
|

|
|
|
|
These to tutorials have been made to show how the effects and transitions that was added withing our trailer

|
Throughout our trailer, we used a range of video techniques of camera shots/angles such as close-ups of the characters we focused on, we believed quick cuts was important especially when the montage starts because this will build up tension in a horror teaser trailer and we also followed the conventions of existing ones so that’s what we used. We also used transitions such as fading from one scene to another we feel this will have a gloomy effect especially when add the dark blue color to the shot, which also helps connoting that particular scene, is in the past tense, as the trailer plays on the pacing increases to build up the pressure and keep the audience entertained and interest.
|

|
|
The captions we added were a JPEG file
from Photoshop that we made using a Japanese keyboard we borrowed and typing in
the words we needed because as mentioned earlier but it wasn’t accessible to us
after, Final Cut Pro doesn’t use Japanese but if we wanted to, we could of
download Japanese into the software but this will take more time and also,
Japanese have a lot of symbols so it would be hard to type with the Western
keyboard. Photoshop helped us a lot with our
project for creating the media prints and captions for the trailer as well as
other things for planning research so without this software, it would be difficult
to complete most task for this assignment. A tutorial was made above to show how the effects were added to create the final result on the background and the grey figure.

This shows when the music was made on this programe, it has a variety of noise and sounds that could be added together to become a soundtrack for our trailer.
|
To create our soundtrack we used two
different programs, which were Soundtrack Pro and Garage Band.
Soundtrack Pro is a music composing and
audio editing application made by Apple Inc. It consists of over 5000 royalty
free professional instrument loops and sound effects such as screaming or a
door shutting. The main purpose of this software is that it allows people who
are not professional composers to create original music for their videos or
project like ourselves.
Sound Garage is also software developed by Apple Inc to create music or podcasts. It can play realistic and sampled instruments used for creating songs or playing music live. We learnt that both program was very useful for us as it allows us to choose the sound we wish to use that would suit our trailer genre, mixing any instruments together creating a final soundtrack, without these software’s, we wouldn’t have manage to create what we have in our trailer now. |
We used the Internet as our main marketing strategies such as
Facebook, Twitter, Youtube, which is a world wide web and via mail.
Youtube allows people to view quickly by just typing in the
name and provides the viewer to dislike or like and even comment plus let us
view the statistics of which countries our trailer’s been watched in and the
age range also which we found very beneficial for when evaluating.
|
We posted the videos to our wall and ask people to watch and
feedback on Facebook which is a social network site and also allows people to
be friends with stranger from across the countries as well as family members
and allows them to share it on their own wall so this would help us promote it
too, like Youtube, it offers people a choice to either like or dislike and comment
with feedback too. We didn’t just upload our videos but both the media prints
we have created.

|
Using Twitter as another social networking site and one of our main marketing strategies, as well as asking people to watch it through our tweets, we also retweeted each other within the group to try and get more attention for people to watch. We believe by using this, our trailer can reach out to everyone around the world to anyone who are interested watching horror or to be specific J-horror.


|


|
How we got audiences to watch our trailer we also mailed them
the link of the video from Youtube so all they had to do was open up the mail
and click the link. What we learnt
from using the Internet is that we can even promote our products to strangers
around the globe and it’s a very useful web that allows us to do almost
anything and the convenience of the Internet is that if you have it on your
phone (3G), you can watch it straight from there, we got most views from mobile
devices and we could tell this because from the Youtube statistics.
|
|
Looking into depth on Youtube, I manage to see many more functions for example the demographics that shows the age range and gender distributi of our audience. It allows us to adjust the dae range and geographic region to see everything being broken down. Below shows us that females have watched our trailer the most mainy between the age of 13-17. We also had people between the age of 18-65+ who have viewed our trailer.
|
Another funtion that can be important and useful to us is the 'traffic sources'. This is the report that shows the various sites and Youtube features through which the viewers have found our trailer. So below shows us the views referral from all traffic has the highest numbers, it also showed us other referrals that people watched our trailer from.
|
This is the overall of what Youtube allows us to see for our trailer, it's very useful for us as it helps us with the audience feedback and tells us who has watched our trailer.
|

|

|

|
Overall, doing this assignment have taught us many things
such as using photography equipments and the settings that can be changed for
suitable lightings of the cameras, using complicated softwares to create music
and edit our trailer like Final Cut Pro, Soundtrack Pro and Sound Garage. Some
of this we have never used before but through this we managed to create our
final products up to standards which we’re happy with. This has helped us use
our creativity skills as well as teamwork put together.
